The replacement ceiling fan switch can be easy if you can understand how it works and how to choose a suitable alternative switch. Today, we will show the details about it, hope it will be helpful to you.

The use of a ceiling fan switch
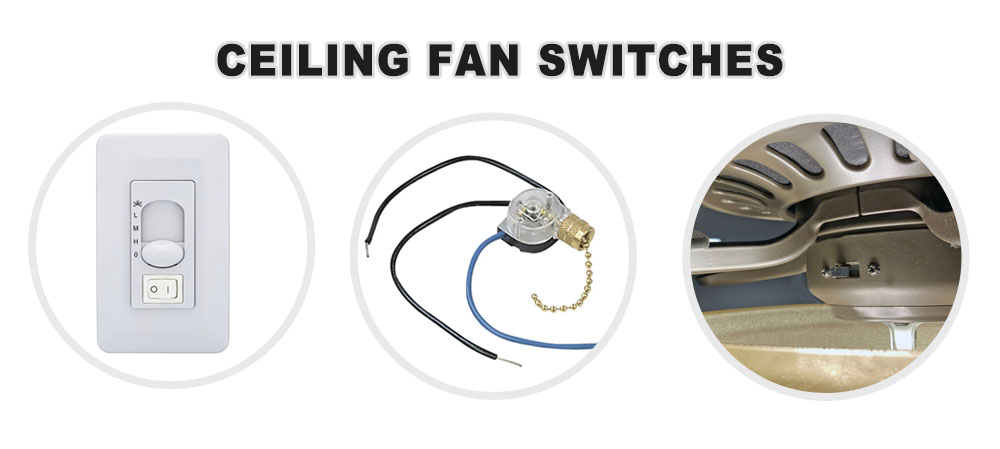
Ceiling fan switches are used to control the speed and direction of the fan blades. Depending on the type of switch, there may be multiple settings that can be adjusted. Here are the common uses of ceiling fan switches:
On/Off Switch:
The most basic type of ceiling fan switch is a power switch, which simply turns the fan on and off.
Speed Control Switch:
Most ceiling fan switches have a speed control function that allows you to adjust the fan speed. The switch usually has three settings: low, medium, and high.
Reverse Switch:
The reverse switch is also called the direction switch. Some ceiling fans have a reverse switch that allows you to change the direction of the fan blades. This can be useful in both summer and winter. In the summer, you want the fan blades to rotate counterclockwise to create a cooling breeze. In the winter, you want the blades to rotate clockwise to help distribute warm air throughout the room.
To use the ceiling fan switch, locate the switch on the fan or on the wall control panel, depending on the type of fan you have. Turn the switch on to start the fan. Use the speed control switch to adjust the fan speed to your desired setting. If your fan has a reverse switch, use it to change the direction of the fan blades as needed.

How to ensure the switch is suitable for my ceiling fan
When replacing a ceiling fan switch, it is important to ensure that the new switch is compatible with your ceiling fan. Here are some steps you can take to ensure that the switch you choose is suitable for your ceiling fan:
Check the type of switch:
Ceiling fans typically require specific types of switches, depending on the type of fan and the functions it has. Check your ceiling fan’s manual or the manufacturer’s website to determine what type of switch is required.
Match the wiring:
Make sure the new switch has the same wiring as the old switch. Check the number of wires and their colours to ensure they match.
Check the amperage rating:
The amperage rating of the switch should match the amperage rating of your ceiling fan. If the switch has a lower amperage rating than your fan, it could overheat and fail.
Check the voltage rating:
The voltage rating of the switch should match the voltage rating of your ceiling fan. Using a switch with the wrong voltage rating could cause damage to your fan or pose a safety hazard.
Consider the functions:
If your ceiling fan has multiple speeds, make sure the new switch has the same number of speed settings. If your fan has a light kit, make sure the new switch is compatible with controlling the lights as well.
It is always best to consult the manufacturer’s specifications to ensure the switch you choose is compatible with your ceiling fan. If you are unsure about which switch to choose or how to install it, it is best to hire a professional electrician to help you.
Replacement ceiling fan switch process
Here are some additional details for each step of replacing a ceiling fan switch:

Turn off the power:
Before the replacement ceiling fan switch, which is the most important step to ensure your safety while working with electrical components. Locate the circuit breaker or fuse box that controls the fan’s power and switch it off.
Remove the switch housing cover:
The switch housing cover is usually held in place by screws or clips. If it has screws, use a screwdriver to remove them. If it has clips, gently pull the cover down until the clips released.
Disconnect the old switch:
The switch will have wires attached to it that connect it to the fan’s motor and/or light kit. Take a photo of the wires or make a diagram of how they are connected to the switch so that you can reconnect them properly later. Use a wire cutter/stripper to remove the wires from the old switch by cutting the wire ties that hold the wires in place and then unscrewing the wire nuts that hold the wires to the switch terminals.
Install the new switch:
Take the new switch and connect the wires to the corresponding terminals. Use wire nuts to secure the wires to the terminals. Tighten the wire nuts to ensure a secure connection.
Reattach the switch housing cover:
Carefully replace the switch housing cover and secure it with screws or clips.
Turn the power back on and test the new switch:
Turn the power back on at the circuit breaker or fuse box and test the new switch to ensure it is working properly. If it is not working properly, turn the power back off and check the connections to ensure they are secure.
Remember to always prioritize safety when working with electricity. If you are not confident in your ability to perform this task, it is best to hire a professional electrician.
All in all, the replacement ceiling fan switch process is not hard if you can know these three points: the use of the ceiling fan switch, how to choose a suitable switch, and the replacement process. As a switch manufacturer, we supply all kinds of switch products and the products also have safety certifications, like the UL, ENEC, etc. As well as we have many of them that can be used in the ceiling fan. Welcome to contact us for any cooperative opportunity.
